That box of outgrown baby clothes sitting in the cupboard is filled with first moments—the tiny onesie they wore coming home from the hospital, the sleepsuit with the worn-out knees from learning to crawl, or the bright holiday outfit from their first birthday.
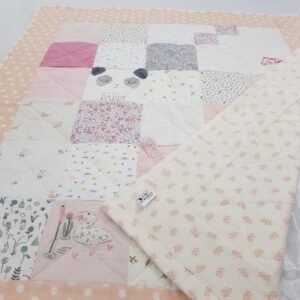
While it is hard to let go of those memories, keeping clothing tucked away in storage boxes means those moments stay hidden. Creating a baby clothes memory quilt is one of the most meaningful ways to upcycle those precious garments into a functional heirloom you can cherish every day.
If you are thinking about how to turn outgrown baby clothes into a handmade memory quilt, here is a complete guide to the process—from stabilizing stretchy fabrics to stitching it all together.
What You Need to Make a Keepsake Memory Quilt
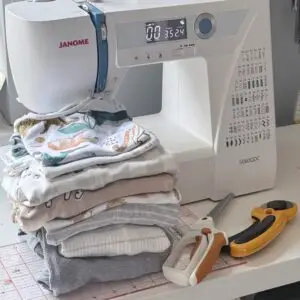
Before making your first cut, gather your tools. Working with soft, stretchy baby clothing requires a few specific items to keep your quilt blocks flat and square.
15–25 baby outfits (depending on the size of the finished blanket you want).
Lightweight fusible interfacing (essential for stabilizing jersey fabrics).
Quilting ruler & rotary cutter (a 5″ x 5″ or 6″ x 6″ acrylic square works best).
Fabric shears and pins/clips.
Iron and ironing board.
Quilt backing fabric (soft fleece, plush fabric, or high-quality cotton).
Low-loft quilt batting.
Sewing machine and coordinating thread.
Don’t Want to Cut Into Sentimental Clothes Yourself?
Scared of making a mistake with those precious first sleepsuits, or simply don’t have the time to sew it all together? I can create a custom keepsake quilt for you! You choose your favourite outfits, send them to me, and I will handle all the stabilizing, precise cutting, and stitching with expert care.
https://beemymemory.co.uk/ Click here to view custom keepsake options and commission your quilt
4 Steps to Sew a Baby Clothes Memory Quilt
Step 1: Prep and Stabilize Your Fabric
Baby clothing is almost always made from stretchy jersey knits. If you try to sew stretchy patches straight onto each other without preparing them first, your seams will twist, stretch out of shape, and pucker.
Wash and press all the clothing (avoid using fabric softener).
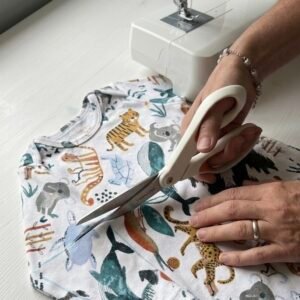
Cut open the side seams of each onesie or sleepsuit so the fabric lays flat.
Cut pieces of fusible interfacing slightly larger than your target square size.
Iron the interfacing onto the back (wrong side) of each section of clothing following the package instructions.
Pro Tip: Interfacing is the secret magic step! It turns stretchy jersey into stable fabric that sews just like regular cotton.
Step 2: Cut Your Blocks and Design the Layout
Once your fabric pieces are backed with interfacing, use your acrylic ruler and rotary cutter to trim them into uniform squares.
Choose your square size: 5-inch or 6-inch squares are usually ideal for tiny baby items, allowing you to highlight sweet motifs, appliqué, or pocket details.
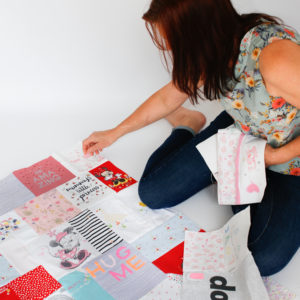
Arrange your design: Lay out your cut squares on a large table or the floor. Mix up colors, balance dark and light shades, and scatter patterned pieces across the grid.
Snap a photo: Always take a quick picture of your floor layout on your mobile phone before moving anything! You will need this as a reference guide at your sewing table.
Step 3: Stitch the Quilt Top Together
Work row by row to assemble your quilt top.
Take the first two squares of Row 1 and place them right-sides together.
Sew along the edge using a 1/4-inch seam allowance.
Keep adding squares across until your first row is complete, then press the seams flat.
Repeat this process for all of your rows.
Join the completed rows together, pinning carefully at each corner intersection so your points match neatly.
Step 4: Layer, Quilt, and Bind
Now you are ready to construct your finished quilt:
Layering: Place your backing fabric right-side down, lay your batting over it, and place your finished pieced top right-side up on top.
Basting: Smooth out any ripples and secure all three layers together using safety pins every few inches.
Quilting: Stitch “in the ditch” (along the seam lines of your squares) or sew a simple grid pattern over the quilt.
Binding: Trim away any excess batting and backing, then stitch your double-fold binding around the outer edges to seal the raw edges cleanly.
Caring for Your Keepsake Quilt
Because memory quilts bring together a wide variety of fabrics, trims, and cottons from different garments, it is best to treat them gently. Wash your finished quilt on a gentle, cold-water cycle with a mild detergent. Line dry or tumble dry on low heat to keep the stitching strong and colors vibrant for years to come.
Ready to Turn Your Baby’s Clothes into a Timeless Heirloom?
Creating a memory quilt takes patience, practice, and the right tools—but the memory is worth preserving. If you would prefer to hand your cherished collection of clothing over to an experienced maker to handle every detail for you, I am here to help.
Explore Keepsake Options & Request Your Custom Memory Quilt Here https://beemymemory.co.uk